Ubuntu-set Network proxy with Authentication , we know that Ubuntu provides various ways to access Internet through proxy servers. One of the easiest ways is to use the Gnome Network Properties.
To use Gnome Network Properties,
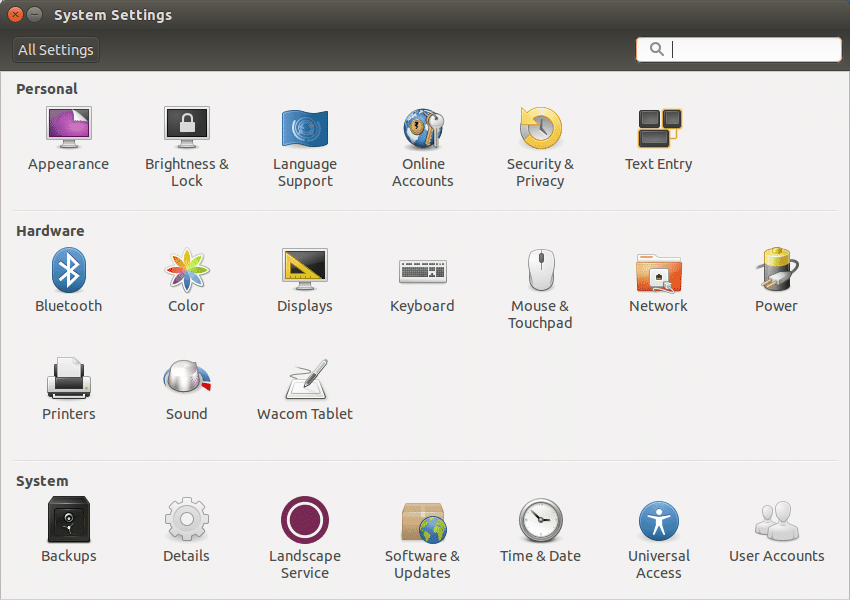
1. Go to System Settings
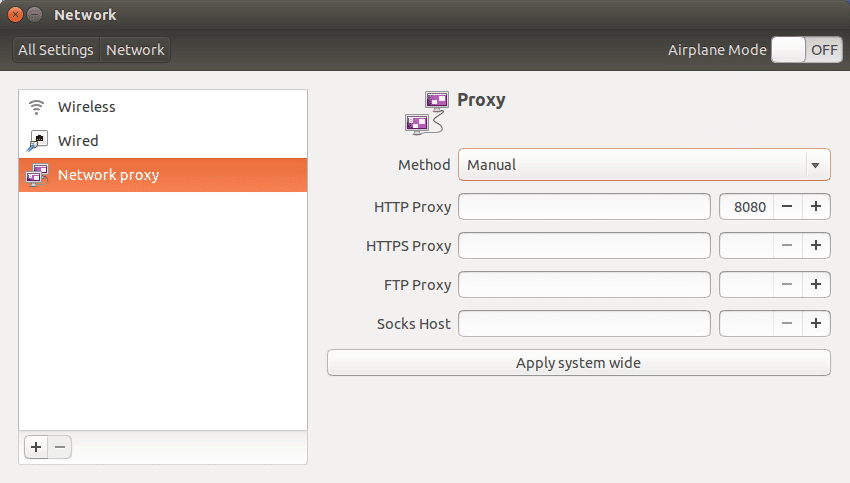
2. Click on Network and then click on Network proxy.
3. Select Manual in Methods and then insert proxy details
4. Finally click on “Apply System Wide” and you are done.
If you are accessing Internet from School/College/Office network, chances are that you need to enter authentication details. And that’s where Gnome Network Properties fails. It does not provide any means to connect through a proxy server.
Another problem that occurs sometimes after you set proxy through Settings -> Network -> Network Proxy -> Manual -> Apply System Wide is that the packaging tool apt-get and Ubuntu Software Center can not connect to Internet.
There are two ways to overcome these problems.
One simple way is to set up a temporary proxy session through terminal. In that particular session, you can browse the Internet as well as download and install packages through apt-get. If you are using a http-proxy, then to Set up a temporary proxy session, type the following in the terminal –
export http_proxy=http://proxyaddress:proxyport
Replace proxyaddress with your host address (e.g 10.0.0.3) and proxyport with the required port (e.g 9050)
If the server you are trying to connect uses anything other than http-proxy like a ftp-proxy or https-proxy, just replace the http-proxy part of the above command with ftp-proxy or https-proxy
If you are using authenticated proxy, then you need to enter your username and password in the same command like this –
export http_proxy=http://username:password@proxyaddress:proxyport
As stated earlier, this method creates a temporary proxy session and it will be over once you log out of the system. You can, however, create a permanent proxy session by the following steps –
Open the terminal and type the follwing –
sudo gedit /etc/apt/apt.conf.d/40proxy
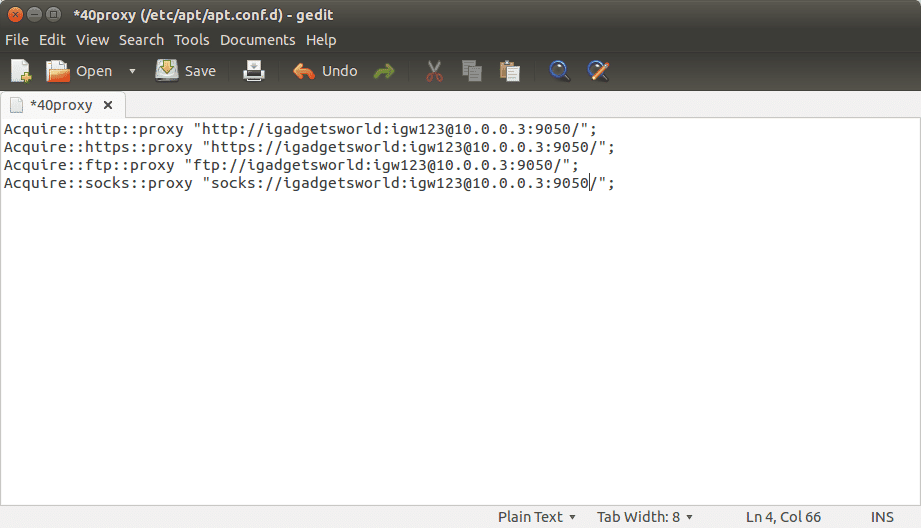
This will create a file 40proxy in the /etc/apt/apt.conf.d directory and will open it in gedit text editor.
Now, add the following lines in the editor (alternatively just copy and paste the following)
Acquire::http::proxy “http://username:password@proxyaddress:proxyport/”;
Acquire::https::proxy “https://username:password@proxyaddress:proxyport/”;
Acquire::ftp::proxy “ftp://username:password@proxyaddress:proxyport/”;
Acquire::socks::proxy “socks://username:password@proxyaddress:proxyport/”;
Replace all the username and password with your username and corresponding password. Also replace proxyaddress with your host address (e.g 10.0.0.3) and proxyport with the required port (e.g 9050). Refer the screenshot below as an example –


