Xiaomi Redmi 1s is all that is being talked about in India. It’s popularity is spreading like fire and each day more and more people are falling for the new phone. Xiaomi is using flash-sale mechanism to sell the product via Flipkart. The registration for the next sale has already been started. Head on to Xiaomi’s Flipkart page to be eligible for the sale on 16th September at 2pm.
Also have a read on our Best tips and tricks to buy Redmi 1s to increase your chances to successfully purchase a piece.
So what after you get hands on the Xiaomi Redmi 1s? Ofcourse if you are a techie and love playing with your phone then rooting and installing a custom recovery would be the first thing on your mind. For people who don’t know what rooting is then in short its a way to open gates to completely customize your phone right from the system level. Though its risky but following proper procedure will help you achieve your goal successfully! We are presenting you a guide to successfully root and install custom recovery to your Xiaomi Redmi 1s. Lets being!
Caution:
The process is extremely easy but still no one from www.igadgetsworld.com is responsible for anything that happens to your phone. We will not be liable for anything wrong you do which leaves your device bricked.
To get updates back you can unroot the phone or flash a stable stock rom without wiping the device.
Pre-requisites:
Please ensure to have the following aspects before we being:
-Create a manual backup of your all the data stored in your Redmi 1s to make restoration afterwards easy.
-Enable the Developer Option by going Settings > About Phone then tap Build Number 7- times.
-You must have Stock MI-Recovery 2.0.1 installed on your Redmi 1s.
-Battery level of about 75% to let the process finish without obstructions.
Root process:
-To begin with the root process download the update file and save it on your PC.
-Connect your Redmi 1S via USB cable.
-Copy the file update.zip to the internal storage (root of internal storage, meaning the top most folder).
-Disconnect your Redmi 1S properly from USB via ‘Safely Remove Hardware or Eject Media‘.
-Boot into Mi-Recovery (for this launch the Updater app, press the menu/options button and from the menu choose ‘Reboot to recovery mode‘)

-In the Mi-recovery select and confirm ‘English‘ for ease in selecting options.
-Select and confirm ‘Install update.zip to System’ which will take just a moment to flash the update.zip file.
-Select and confirm ‘Reboot‘
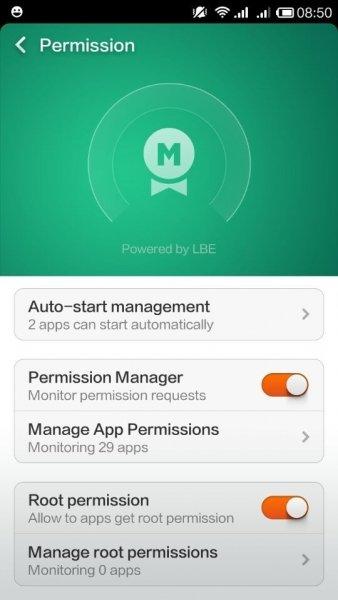
-After Reboot go to Security -> Permission and activate Root permission
 Your Xiaomi Redmi 1s is now successfully rooted! Congratulations! Wasn’t that easy? Hey but hold one. Now what if one day you wake up and feel that you need to unroot your Xiaomi Redmi 1s? No worries, we got that covered too!
Unroot process:
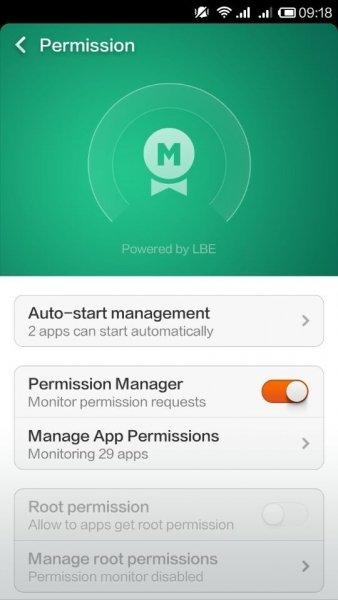
-Go to Security -> Permission and deactivate Root permission.
-Download the Unroot zip and save it on your PC and rename it as update.zip.
-Connect your Redmi 1s again via USB.
-Transfer the update.zip to internal memory.
-Disconnect your Redmi 1S properly.
-Boot into Mi-Recovery (for this launch the Updater app, press the menu/options button and from the menu choose ‘Reboot to recovery mode‘).
-In the Mi-recovery select and confirm ‘English‘.
-Select and confirm ‘Install update.zip to System‘, this will take only a moment.
The phone is finally unrooted and you are back to square one.
Now that you have ROOTED your Xiaomi Redmi 1s, you might want to flash a custom recovery like CWM or TWRP in your phone. Wanna know how to do that too? Keep reading!
Installing TWRP on Xiaomi Redmi 1s:
-Ensure your phone is ROOTED already.
-Download the TWRP recovery from here.
-Boot in recovery mode (Vol+ & Power).
-Select English language.
-Install update file.
-Power Off your device.
-Boot in recovery mode again (Vol+ & Power buttons together).
That’s all, TWRP is now installed on your device.
Hope you learnt something today with this post. We shall come up with some more tutorials related to Xiaomi Redmi 1s.


